Delicious Gluten-Free Tiger Nut Breakfast Cookies! A guilt-free cookie made with superfoods, seeds, and hearty gluten-free grains that are vegan, nut-free, sugar-free, and sweet as a cookie should be, without the guilt.
Gluten-free tiger nut breakfast cookies are the cookie that surpasses all other cookies because they are suitable for breakfast and free of all the nasties like sugar, dairy, gluten & soy. Hearty enough for breakfast, and sweet enough to be a cookie sans processed ingredients.
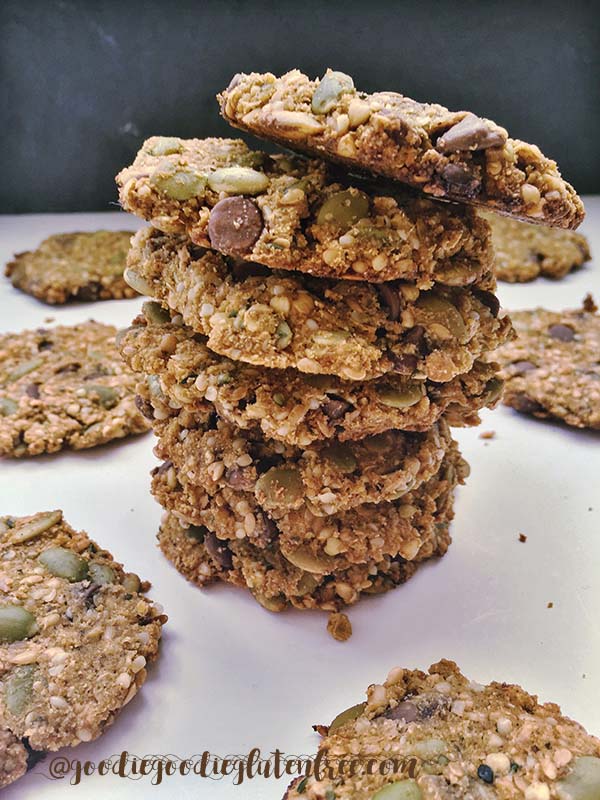
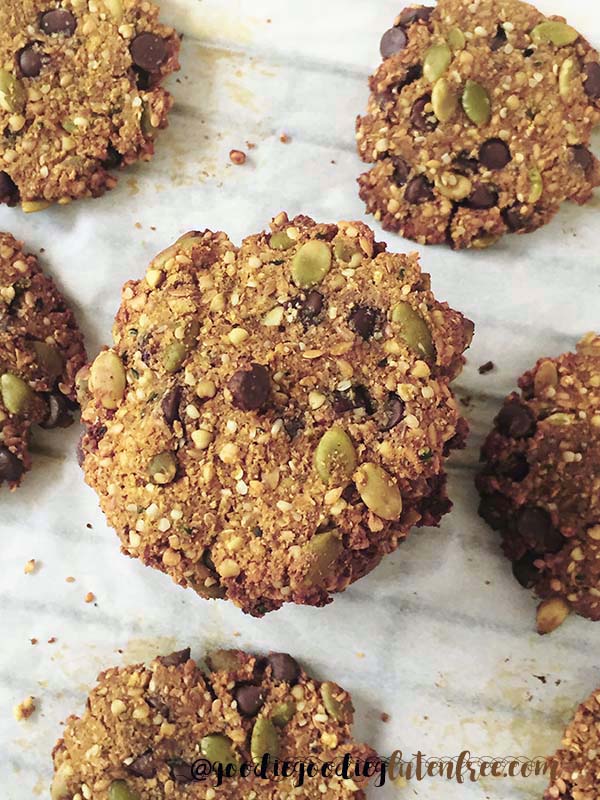
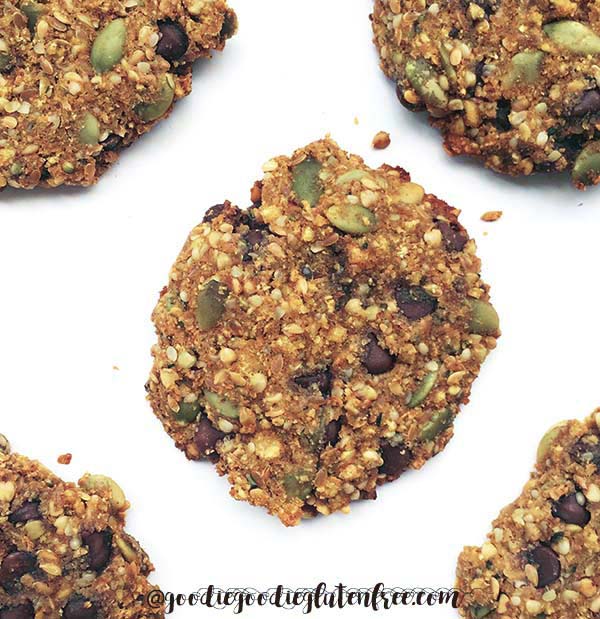
It's a mighty hearty cookie with a soft-n-chewy inside and a crispy outside. These are so delish, you won't want to just eat one. And that is the great part about these cookies-you don't have to limit yourself. Eat the whole batch in one sitting if you want.
WHY CREATE A SUGAR-FREE COOKIE?
I think it's everyone's dream to be able to eat cookies for breakfast. But no one including myself wants to feel that sugar slump, feel super bloated from eating processed carbs, or experience side effects like acne, stomach aches, headaches, and destroyed diets over a cookie! Naturally, when I created these cookies, I had one thing in mind. I wanted this cookie to be completely sugar-free, and using sweet Tiger nuts was the way to do it. No dates. No maple syrup, or honey.
100% sugar-free. I wanted this cookie to be suitable for candida dieters, diabetics, and anyone else who wanted a cookie that tasted sweet without all the bad stuff a cookie usually contains. I wanted to create a delicious treat you didn't have to feel bad about eating. The experience of eating something wonderful should be pleasurable and guilt-free and that is what these cookies do.
So first I created these gluten-free tiger nut cookies with dates and refined sugars like agave. And through that process birthed the ones you see here, the love child, the sugar-free version. The version is suitable for breakfast. The ones that are hearty and filled with nutrients that WILL keep you full until lunch. The ones you don't have to feel bad about eating, even if you eat the whole batch!
The base of these cookies uses a small tuber root veggie known as TigerNuts; the latest superfood. They are by no means nuts. In fact completely nut & tree nut-free. Tiger Nuts originated from Africa and are currently cultivated in West Africa and Spain. And there are a few reasons I can't get enough of Tiger Nuts.
TIGER NUT NUTRITIONAL BENEFITS:
- Nut-free, and a suitable option for people with allergies
- Certified gluten-free and made in a gluten-free facility
- Sweet tasting
- Offers a powerhouse of nutrients because it is a root vegetable
- Loaded with iron & potassium
- Certified paleo, dairy-free, certified vegan, certified organic, certified Non-GMO, and happen to be kosher.
- Act as a prebiotic fiber, they help your gut's natural probiotics thrive
- Optimize digestion
- A single ounce of tiger nuts has 40% of our recommended daily amount of fiber
To make a long story short, besides all of the tiger nuts amazing benefits, I didn't just dream up a tiger nut cookie. It wasn't like that at all. It was more like I had over 40 food sensitivities including nuts, many seeds, and many other foods when Organic Gemini launched their brand introducing Tiger nuts to the wellness community and society as a whole. This was in 2014, and I was feeling super sad that there was so much my body reacted to and was having a hard time feeling "normal". And when I saw a giveaway for these "nuts" and their Horchata (dairy-free milk) through Jordan Younger's blog The Balanced Blonde, I immediately entered.
THE BIRTH OF THE TIGER NUT BREAKFAST COOKIE
I even thought that there would be no way I would be able to eat them with all of my food issues, but I was compelled to enter anyways because the thought behind it was "wouldn't it be nice if I could eat these and not have a Benadryl reaction?". So I entered, and I won a huge case of 12 of their kinds of milk plus a bag of Tiger Nuts!! And guess what? I was able to eat them without any issues! I was so happy! Part of the giveaway was to comment on how we would use them, so I really got creative and started to think of all the possibilities these TigerNuts could do, or replace.
That led me to think I could make Tiger Nut butter, you know just like almond butter but without the allergy? I had never thought of cookie dough. I was all about turning this into butter, but what I learned in the process is that because they are a tuber root veggie they do not break down the way a nut would and they get really moist and wet when you add liquid to them. And the more I added oil or agave, the moister they got and NOT in a good way. I was left with this crumbly mess and I thought to myself, I do not want to waste this, and what can I do with it? Naturally, that is how my Tiger Nut cookie was born.
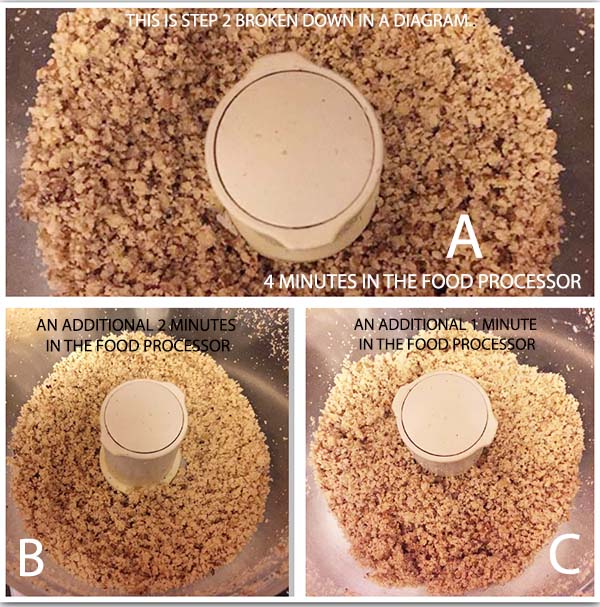
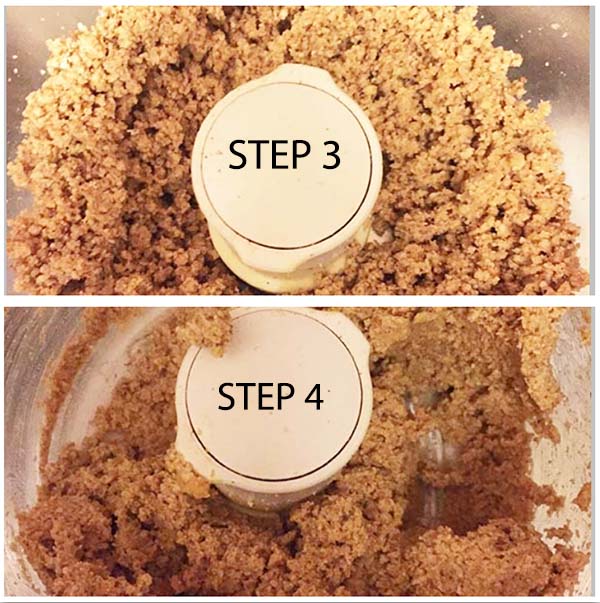
Since Tiger nuts, and baking with Tiger Nuts are a fairly new baking ingredient I've included a few pictures of how the consistency of the dough is meant to look. Scroll down for guidance.
Ready to gather your ingredients?
Gluten-Free Breakfast Tiger Nut Cookies
Equipment
- food processor
Ingredients
- 1 cup peeled tiger nuts
- 3 tablespoon tiger nut oil
- ½ cup sweet potato puree canned
- ½ teaspoon cinnamon
- ½ teaspoon nutmeg
- ¼ teaspoon cloves
- ¼ teaspoon cardamom
- ¼ teaspoon pink Himalayan salt or sea salt
- 12/13 drops liquid stevia
- ¼ cup hemp seeds
- ½ cup pumpkin seeds
- 3 tablespoon buckwheat groats gluten-free
- 2 tablespoon flax seeds whole seeds, not ground
- ½ cup chocolate chips or carob chips
Instructions
- Soak the Tiger Nuts in a container or mason jar with the lid closed in warm water for 2 hours. Water should cover the nuts. Leave jar on the counter, do not refrigerate.
- After the Tiger Nuts have been soaked for 2 hours, drain the TigerNuts and discard the water.
- Preheat oven to 300 degrees Fahrenheit.
- Then add the soaked Tiger Nuts into a food processor and process the mixture until it becomes a crumbly cookie dough texture, about 7 minutes. The Tiger Nuts should be so broken down that they no longer resemble the original large chunky round TigerNut. The color of the batter should get lighter with food processing time, and that is what you will want. You may have to open the lid of the food processor and scrape the sides a few times. The consistency should look like little crumbs. See diagram.
- Add 2 tablespoons of the oil, all of the spices (cinnamon, nutmeg, cardamom, and cloves), pink salt & 12-13 drops of liquid stevia. Process for under a minute till spices are well blended. As you continue to process the cookie mixture, you will notice that the color of the crumbly dough will darken and get more broken down. See diagram for steps 3 & 4.
- Follow with ½ canned sweet potato puree & remaining tablespoon of oil and process till well blended. If you blender stops blending, use a spoon or your hand to mix this portion of the dough well. At this point the dough is pretty much your standard sticky cookie dough.
- Then transfer the dough to a medium size cooking bowl.
- Fold in ¼ cup hemp seeds, 2 tablespoons flax seeds and 3 tablespoons buckwheat groats into the cookie dough mixture and massage with your hands making sure these add-ins are evenly mixed throughout the dough.
- Add in ½ cup of pumpkin seeds and ½ cup of gluten-free carob or chocolate chips into the cookie dough mixture and massage with your hands making these add-ins evenly mixed throughout the dough.
- Prepare your 2 baking sheets and line them with parchment paper (no spray needed). Form medium size balls and place on the baking sheets with space in between each one. This type of batter will not spread the way regular cookies bake, so you don’t have to leave a ton of space in between each one. Wet your palm with water and then flatten each cookie ball with the palm of your hand and use your fingers if needed to spread or thin the dough. If the edges get messy while doing this, simply re-mold / tweak the dough’s edges with your fingers (think pottery class).
- If the mixture is too sticky simply run your hand under water, blot with a towel and then flatten some more. If you don’t flatten these cookies they will not spread on their own, and you will end up with raw cookies. Flattening the cookie is one of the most important parts to gluten-free baking.
- Bake at 300 degrees for 10 minutes using both the middle and bottom racks only. Then swap trays and bake at 350 degrees for 8 minutes max. (the idea for swapping trays is to make sure each tray of cookies is getting baking time on each rack-this part is necessary and essential to your best cookie).
- Remove from heat and let cool on a cooling rack away from the oven and stove. Let cool for about 10 minutes.
- Cookies should be stored in the fridge and enjoyed at room temperature.
Notes
Love & The Best Breakfast Cookie Ever,



 Like Goodie? Wanna fall in love? Follow me on
Shelby
Thanks Julie!
I have been trying to find something yummy, gluten, dairy, sugar and soy free and candida diet friendly to have for breakfast for awhile. There are a variety of things I normally have, but nothing sounds so satisfying as being able to bit into a cookie!! Have all the ingredients at home already and will make them tonight!!
Julie
Shelby!
I so hear that! And that is why I wanted to create a cookie like this that was totally sugar-free! The Candida diet is tough, I will not lie, it is hard. No everyone can do even sweet potato on a Candida diet. I am glad you can! I'm excited for you to make these!!! Let me know if you have any questions on the peeled tigernuts or any steps during the cookie making process!